This is where Valentine’s Day comes in! For most of society, the day is associated with romance. For me, it simply gives character to a monotonous time of year. Just as twinkle lights illuminate the dark month of December, the bright reds and pinks add a spark of charm to get us through a dull period.
My husband and I rarely do much for Valentine’s Day. Crowds are obnoxious, and dating happens year-round. Sometimes we use it as an excuse to give gifts, but there is no obligation to do so. Throughout the first couple weeks of the month, however, we find little ways to celebrate love as a family. On February 1st, my kids wake up to a heart posted on their bedroom doors with a notes detailing something I love about them. Every morning they find a new heart until they receive a small Valentine’s Day goodie bag waiting for them on the 14th.
What is especially fun this time of year, are the crafts! Who doesn’t have core memories of making popsicle stick picture frames and heart-shaped cards for their parents? Does anyone else get that warm fuzzy feeling when they recall a scene of dripping glue bottles, spilled glitter, and scraps of red, pink, and white paper scattered across a school table?
Remembering it for yourself is one thing. Imagining it as an adult may cause a conniption. What is it they say? Glitter is the herpes of art supplies?
However, mayhem is not necessarily required for arts and crafts with small children. The other day I wanted a creative activity to try, but lately, I’ve struggled to keep up with housework. I didn’t want additional chaos added to my life.
As it turns out, this dilemma is the perfect opportunity for washi tape.
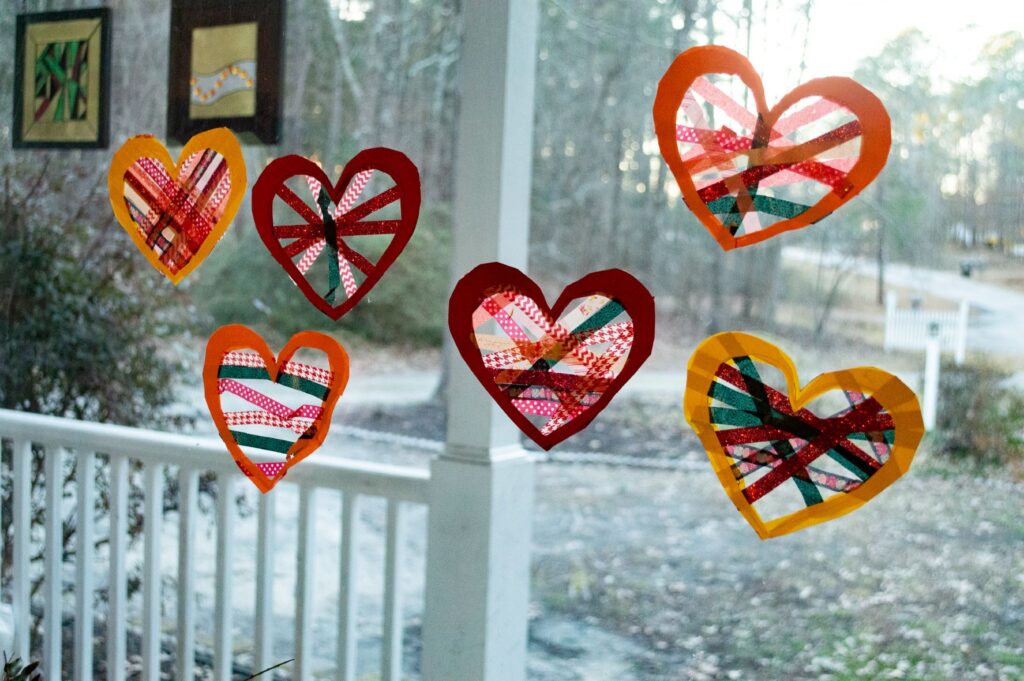
These suncatchers are easy peasy to make and look adorable displayed in windows. Go wild in choosing washi tape designs, and have fun lining different patterns across the hearts. As an added bonus, you can still achieve that traditional Valentine’s Day glitter without leaving your house in a wreck, thanks to sparkly designs currently available at Michaels.
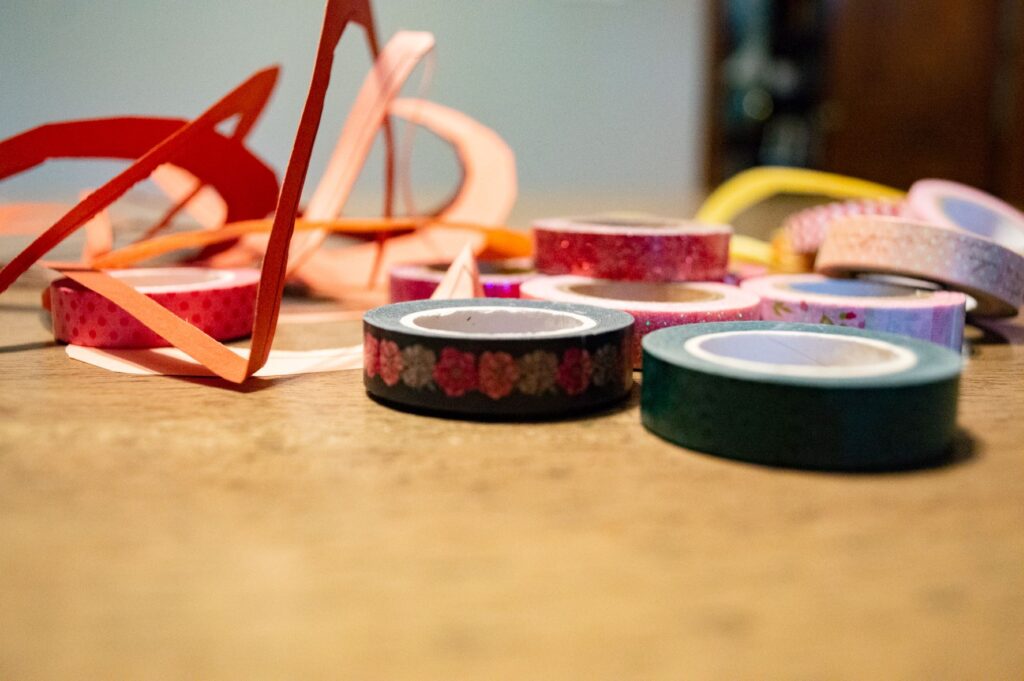
To get started on these beauties, you’ll need to gather a few basic supplies:
Themed washi tape
Glue stick
Scissors
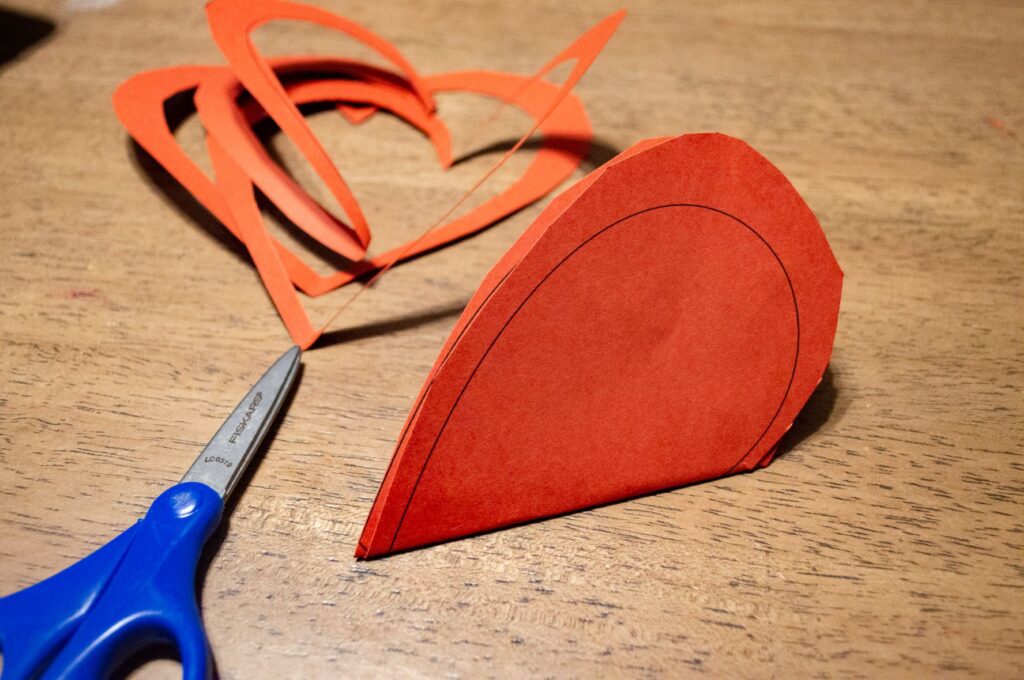
This print out on colorful construction paper or cardstock:
To begin, use your colorful cardstock/construction paper to print out the hearts. Each print will make one suncatcher.

Using the outer lines as your guide, cut out each heart. Next, you will cut out the inner heart. To make this easier, fold your heart in half and follow the inner line just as you would make a normal paper heart.
Next is the fun part! Lay strips of washi tape across one of your heart cutouts. Play with any designs or patterns that inspire you!
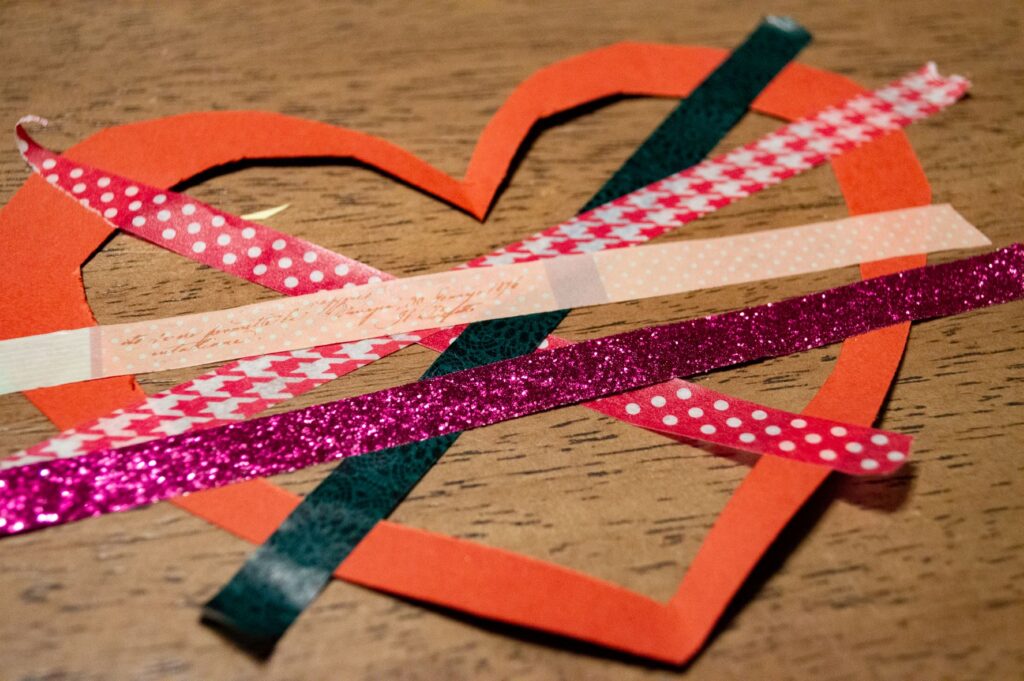
You can cover as little or as much of the heart as you want. When finished, run a glue stick on the surface of the heart (on the non-sticky side of the washi tape). Cover your heart with the second heart cut out. Trim any access washi tape from the edges.
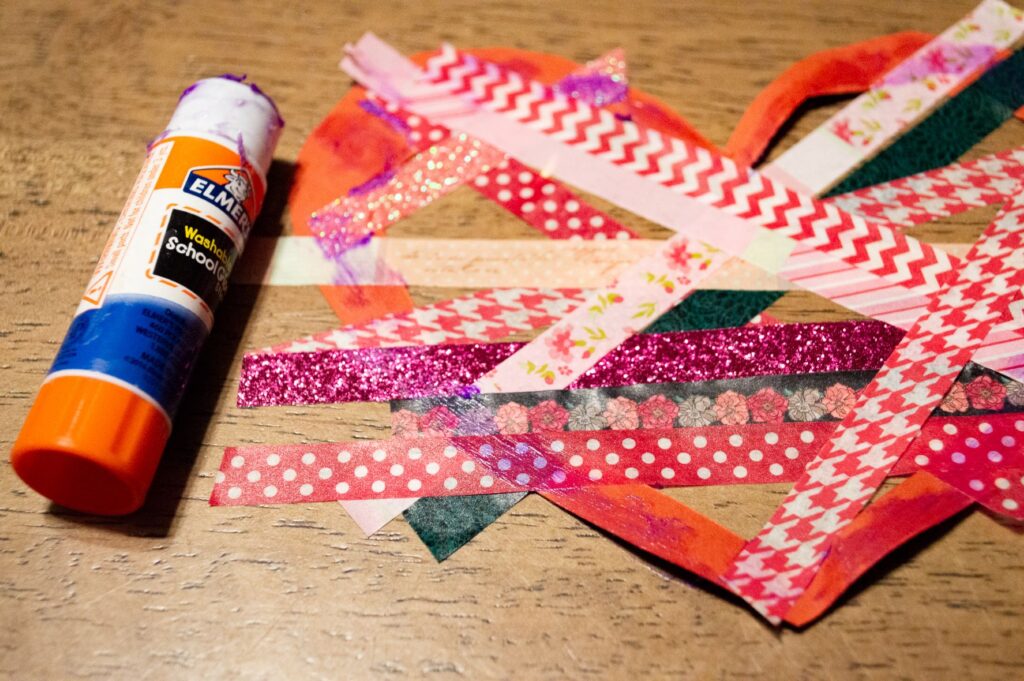
Press the sticky side of the washi tape to your windows, and enjoy these lovely suncatchers!
Once we finished our schoolwork for the morning I had to repeat this experiment just so the kids could have time playing in the suds. I gave them cups and spoons, but they definitely preferred using their bare hands. Who wouldn’t!? Admittedly this can get messy, but the good news is that clean-up is easy, especially if you follow my advice and use a sink or deep baking dish.
We took this experiment from the textbook Science in the Ancient World by Berean Builders. If you’re in the market for a homeschool science curriculum, I highly recommend this company. As exemplified by this activity, the experiments are hands-on and require simple household products you either have around the house or can easily pick up at your local store.
For this lesson, our focus was on an ancient scholar named Democritus (c. 460 BC – c. 370 BC), who is credited as one of the earliest scientists to discuss the existence of atoms. We’ve also discussed the various ways scientific theory changes over time as new evidence suggests different explanations. While Democritus helped introduce the world to atoms, not all of his theories were true. In fact, his belief that atoms are indivisible (unable to be broken into smaller parts) lasted about 2,000 years until German scientists split the uranium atom in 1938!
Democritus also believed that the difference between atoms is primarily based on shape. For example, he believed iron atoms have hooks linking them together to make them hard, salt atoms have sharp edges explaining their taste, and water atoms have a smooth surface that makes water slippery. However, we now know this isn’t true. Salt isn’t made out of salt atoms. Water is not made out of water atoms. Iron is not made out of iron atoms.
Instead, most things are made out of molecules, or a combination of atoms and ions joined together. In this experiment, we demonstrate the ability to break apart molecules to produce something different. It’s simple…
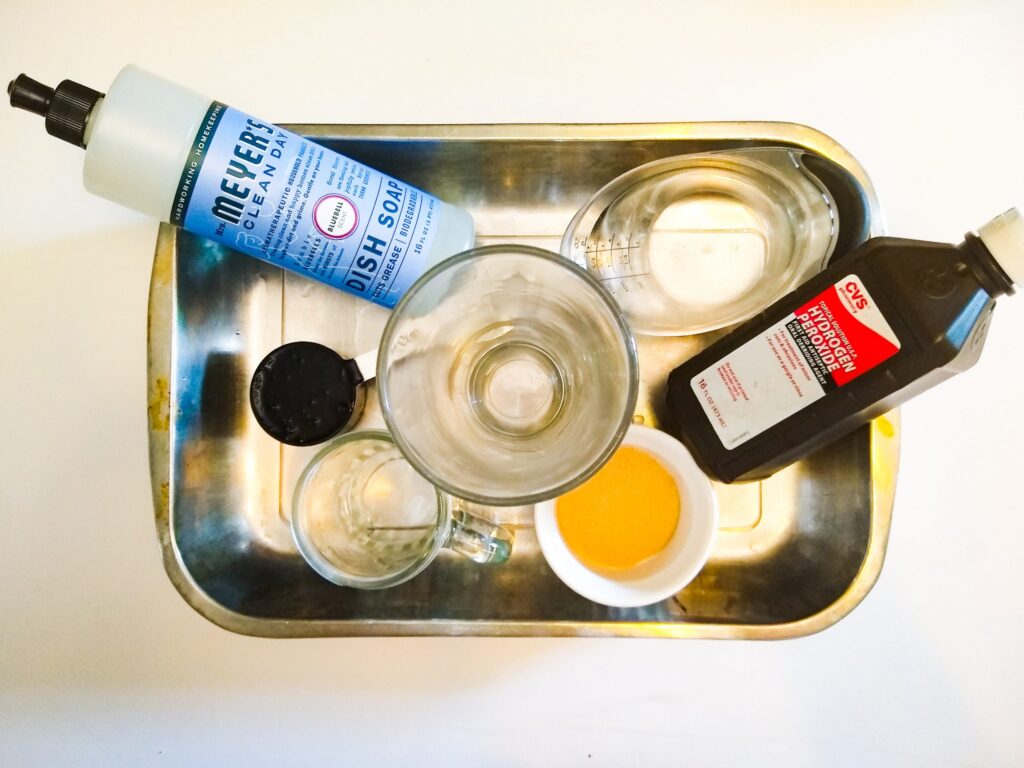
What you need
1 cup hydrogen peroxide
1 TBS active dry yeast
¼ cup dish soap
¼ cup warm tap water
Other equipment:
A tall glass
A small glass
An empty sink or a deep baking dish to control the mess.
Directions
- In a small glass, combine yeast and warm water. Stir with a spoon and let it sit for roughly 2 minutes.
- Pour hydrogen peroxide into the taller class, followed by the dish soap. Swirl the glass so the two liquids mix (do not use the same spoon you used for the water and yeast).
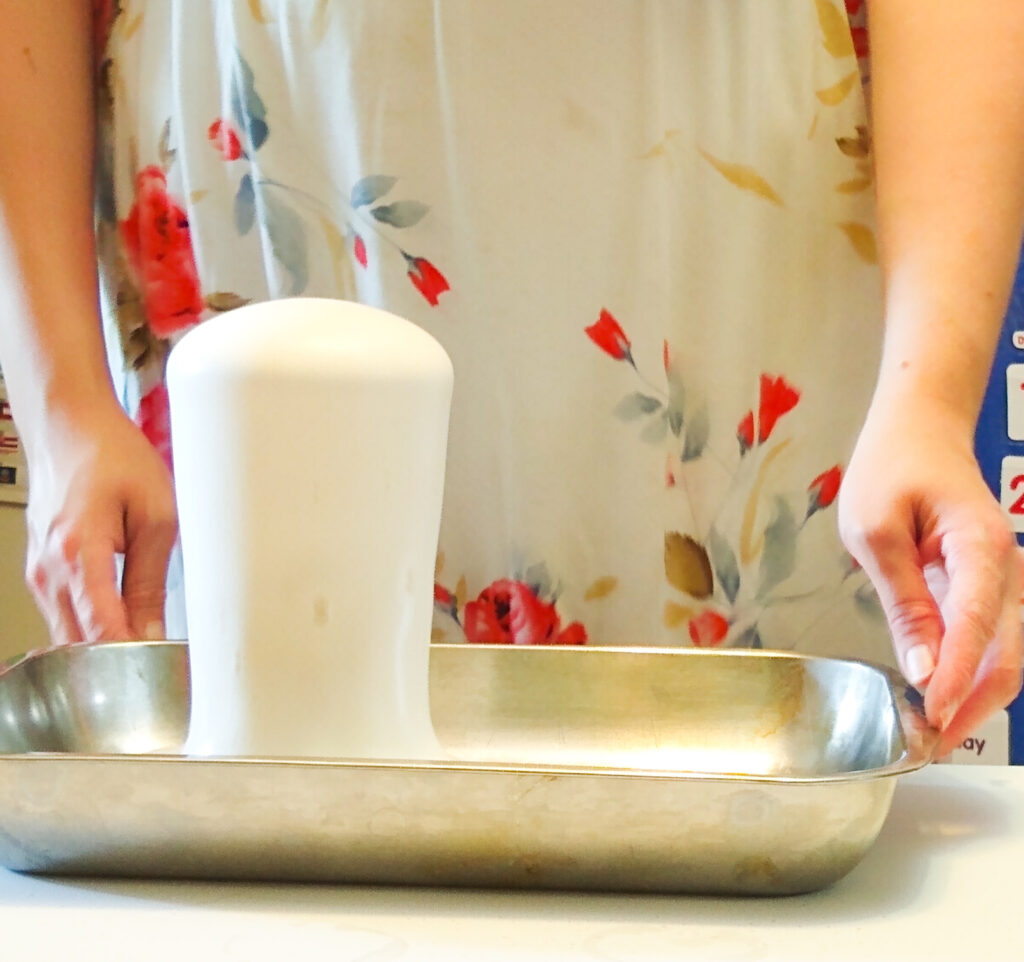
- Place the tall glass in an empty sink or the middle of a deep baking dish. After allowing the yeast mix to sit for a couple of minutes, slowly pour the contents of the small glass into the tall glass containing hydrogen peroxide and dish soap.
Watch what happens…
You just witnessed decomposition! To put it simply, we watched as something broke down into smaller things.
Hydrogen peroxide is made up of molecules containing 2 hydrogen and 2 oxygen atoms. Being an unstable arrangement, the hydrogen molecules try to get rid of the oxygen molecules. This is why we store hydrogen peroxide in closed and dark containers. Light and air speed this process along, which will eventually leave you with…water.
Yeast contains a chemical (catalase) that also accelerates decomposition. So when we mixed the dissolved yeast with the hydrogen peroxide, the hydrogen peroxide molecules released their oxygen atoms. Oxygen, being a gas, escaped into the soap and created the foam we used to visually see this process take place.
Neat huh? The kids certainly thought so. We will revisit this lesson in later years when we’re ready to dive into a deeper understanding of atomic and molecular science. For now, it was a fun way to introduce the concept.
*As a side note, I am not affiliated with Berean Builders, nor was this a promotional post beyond my personal experience and recommendation
Originally posted July, 2020
]]>They have a magical ability to manifest imaginary ice cream out of nothing and turn any location into an ice cream parlor. In fact, on the first day of preschool, my son claimed “ice cream man” as his dream job.
My kids are seriously dedicated to ice cream, but who isn’t?
With summer here, I wanted to do a little something to enhance their experience with the fantasy ice cream business. I know there are a number of Play-Doh sets themed after ice cream shops, but we honestly have enough Play-Doh-related tools and the color of the dough turns ugly after a few minutes of manipulation by a toddler.
And, to be completely honest, I recently discovered a really cool way to make non-toxic play dough, and I wanted to see if it works.
Surprisingly, it worked extremely well!
The ingredients might be a little intimidating for parents, especially those of the healthy variety. It seems like the consistency should be sticky and gross, and it is certainly a lot of sugar to put in front of kids. However, this worked out significantly better than I thought. The texture of the dough matched pretty closely with traditional Play-Doh, and since I didn’t tell my kids (right away) how I made the dough, eating it didn’t occur to them…
Eventually, my son did ask me about the ingredients, and I didn’t want to lie.
But! The end result is so sickeningly sweet, he didn’t eat anymore beyond an initial taste test. My daughter, on the other hand, kept licking her “ice cream”, but after a few licks, she got sick of the taste.
This activity was easy to set up, and it kept my kids entertained for hours. Sure, they could (and often do) play ice cream shop with nothing more than their imaginations, but every now and then it’s fun to make their fantasies come alive!
What You Need:
Store-bought frosting
Powdered sugar
Optional:
Food coloring
Ice cream scooper
Small aluminum loaf containers
Sprinkles
Ice cream cones
Instructions:
Choose frosting flavors that match the colors you want. We bought a pink, purple, and white (which we turned into a minty blue using food coloring. Just mix it in before adding the powdered sugar).
Using a spoon, mix your powdered sugar and frosting together. The ratio should be 1:3 (for every 1 cup of frosting, add 3 cups of powdered sugar). If the dough is too sticky, sprinkle in more powdered sugar until it reaches a similar texture to Play-Doh. Eventually, the frosting will clump, and you may need to knead the dough with your hands once it is no longer gooey and sticky.
To really heighten the experience, put the “ice cream” dough in aluminum loaf tins. Give the kids an ice cream scoop (it scoops wonderfully!), sprinkles (or maybe confetti or something else that can substitute sprinkles), and ice cream cones. Don’t forget bowls and spoons as well!
While this recipe does not last forever, it did keep my kids entertained for a couple of days before we had to toss it. But, it’s so easy, I can definitely do this again without stress!
Originally published 6/25/2019
]]>While body riding waves is something spectacular, a child’s true enjoyment is in the sand. It keeps them entertained literally all day long, and while I do keep a watchful eye over them as they play, the endless supply of sand offers me an opportunity to take a break from hovering. My daughter was particularly in love with the gritty mess. So much so, she basically bathed in it…
On the other hand, taking my family to the beach doesn’t necessarily mean I check out for the entire time. On top of making sure we pack enough sunscreen, food, and novels, I also like to plan unique activities. This time around, I discovered an awesome craft!
This was an especially easy activity, and even though it may have gotten messy at certain moments, a quick rinse in the sea took care of that hassle.
All You Need Is:
food coloring, zip lock bags, and if you’re wanting to take your craft home, a bottle of some sort, as well as a funnel. I found plastic and glass tubes on sale at Joann Fabrics. I believe they were something along the lines of “glitter mixing tubes”. They were the bare minimum of what I needed for this activity because I wanted to get enough supplies for the adults to participate too (I know my friends pretty well. As expected, they totally made their own). However, if I do this again and I’m looking to do no more than one or two bottles, there were also larger decorative bottles with corks.
Another tool to consider is something thin and pointy to make designs with your sand. A wooden dowel rod
works fine, especially if it has a pointed end. Usually, you can find these in the cake decorating section of Walmart or craft stores.
The activity itself is simple. Fill a ziplock bag with sand, drop food coloring in, and start shaking. If you want to fill bottles, snip the corner of a bag, fit the funnel over the bottle’s mouth, and fill it with your choice of alternating colors until the bottle is packed full. For a really cool effect, stick a rod down the sides of the bottle to make funky designs with the alternating color layers.
On the other hand…this activity does not need to be a craft you take home! If you’re looking for some colorful beach fun that doesn’t come back with you (because let’s be honest, enough sand will follow you home without you trying), simply drop food coloring onto the ground and mix it in with a pile of sand. The result is vibrant beach sand to make unique and creative sandcastles.
This was truly an awesome beginning to our summer season, and I cannot wait to see what other activities we’ll discover in the next couple of months. At the very least, I’m going to pack food coloring for our next beach trip!
Originally published 7/10/2019
]]>Last week we wrapped up a year of preschool that took us beyond my expectations. We discovered our world through geography lessons using a literature-based curriculum, and simple letter and number recognition activities eventually turned into reading and basic multiplying. Now that I see what happens when I let my son explore the world at his own speed, I am excited to continue our homeschooling journey!
With the free time we now have at the beginning of summer, I introduced some fun by showing the kids a new slime recipe! The best part is the fact that it comes down to only two ingredients, which made set up incredibly easy even if clean-up was more involved.
All this recipe needs is equal parts liquid starch and white Elmer’s glue.
That’s it! Wanting to make a large batch of it, we used four cups of each.
It started out as a pretty messy business while the glue and starch reacted with one another. It takes a few minutes before you begin feeling confident in the texture, but if you do go at it for a while and don’t feel an improvement, you may need to add a little bit of either glue or starch. If it’s too runny add a little more glue. If it’s too sticky, drop in tiny bits of starch.
To make this activity extra fun we added food coloring for a rainbow effect!
The easiest method for this is to divide the slime into individual plastic bags and add the food coloring. This allows you to knead the color into the slime without dying your hands (and prevents mixing colors together to create an ugly brown effect before you have a chance to enjoy the beauty of multi-colored slime).
Once all of our slimes had some color…it was time to play!
Originally published 6/10/2018
]]>As I planned our Five in a Row curriculum schedule back in May, I figured I would arrange the book Katy and the Big Snow for a random week in January. If I were still living in the Midwest, I could easily assume that any point in the winter would be an appropriate time for a snow-themed week, considering there is almost always a white powder on the ground from December-February. Down here in the south, however, I had to take my chances. The best bet would be sometime in January.
Similar to last year when we read The Snowy Day, it just so happened that on the week we were scheduled to read a snow-themed book, we received our 24-hour snowfall. I was overjoyed about the timing!
I love snow days, especially now that I’m living in an area where snow isn’t common. The way it softens the loud hustle and bustle of everyday life is dreamy, and I’ll admit that I love any excuse to spoil my kids. When snow happens here, it shakes up schedules and brings a different atmosphere to the house. It’s a special occasion of sorts, therefore rules can bend and we concentrate on making our day cozy, memorable, and fun!
After doing school work, we went outside to play in the snow, where we built Hudi’s first real snowman (usually we don’t get snowman-worthy snow, so this was pretty exciting). Naturally, hot chocolate followed after, topped with whipped cream and sprinkles. As a continuation of our Tale of Peter Rabbit week, we dabbled in English cuisine and baked delicious raspberry lemon scones. To finish out the night we had one last treat that is a snow day tradition in our home: snow cream!
The snow was marvelous, but since I didn’t expect it, I had “snow” themed fun all ready for the kids, which didn’t require real snow. This was a fun and relaxed winter-themed sensory activity that captured the attention of both my 4 and 1-year-old. They even played together, which I love to see! Clean up was a bit more of a challenge, but nothing a vacuum couldn’t handle.
And the prep? So easy. All you do is mix together:
3 cups baking soda
1/2 cup conditioner
That’s it! Put it in a container, give the kiddos some toys to scoop and shape with, and there you have it. Hours of fun!
Originally published 1/25/18
]]>